Stencil tutorial 1:
the humble beginnings
In this tutorial, I will show you how to create a simple Tower Defense game in StencylWorks. The version I will use is 2.0. This tutorial is aimed at people who have completed the crash courses on the StencylWorks website and have a basic understanding of how StencylWorks works.
In this part, I will create a simple scene with wandering enemies. I will introduce a custom behavior and use some preshipped behaviors to make it seem like a “real” game.
The final result can be played here; it can also be downloaded from StencylForge under the name “Publysher - TD Tutorial #1”.
On Tower Defense Games
Tower Defense games are a popular gaming genre. The player tries to prevent waves of enemies from passing through his screen by placing towers at strategical position. These towers will automatically shoot at enemies, eventually killing them. When enough enemies have passed through the screen, the player looses.
Most Tower Defense games include many more features such as upgrading your tower. Who knows, during our tutorial I might actually implement some of those features.
Popular Tower Defense games include Kingdom Rush and GemCraft Labyrinth.
Starting Up
As usual, begin by starting Stencyl and create a new game. I’ve created a new Web game of 640x480 pixels. After creating your new game, you should expect to see this:
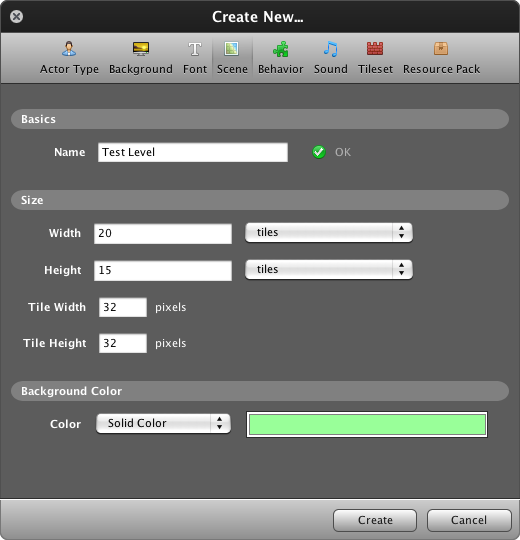
Create a new level called Test Level and give it a light green background color.
Tip: When creating a new game in Stencyl, it is always a good idea to start out with a small playground to test your ideas. Only when your ideas have been proven sound should you continue to building real levels.
Our First Enemy
It’s time for our first enemy. Download this image and import it into StencylWorks using the File > Import Resource… option. Voila: our first evil enemy.
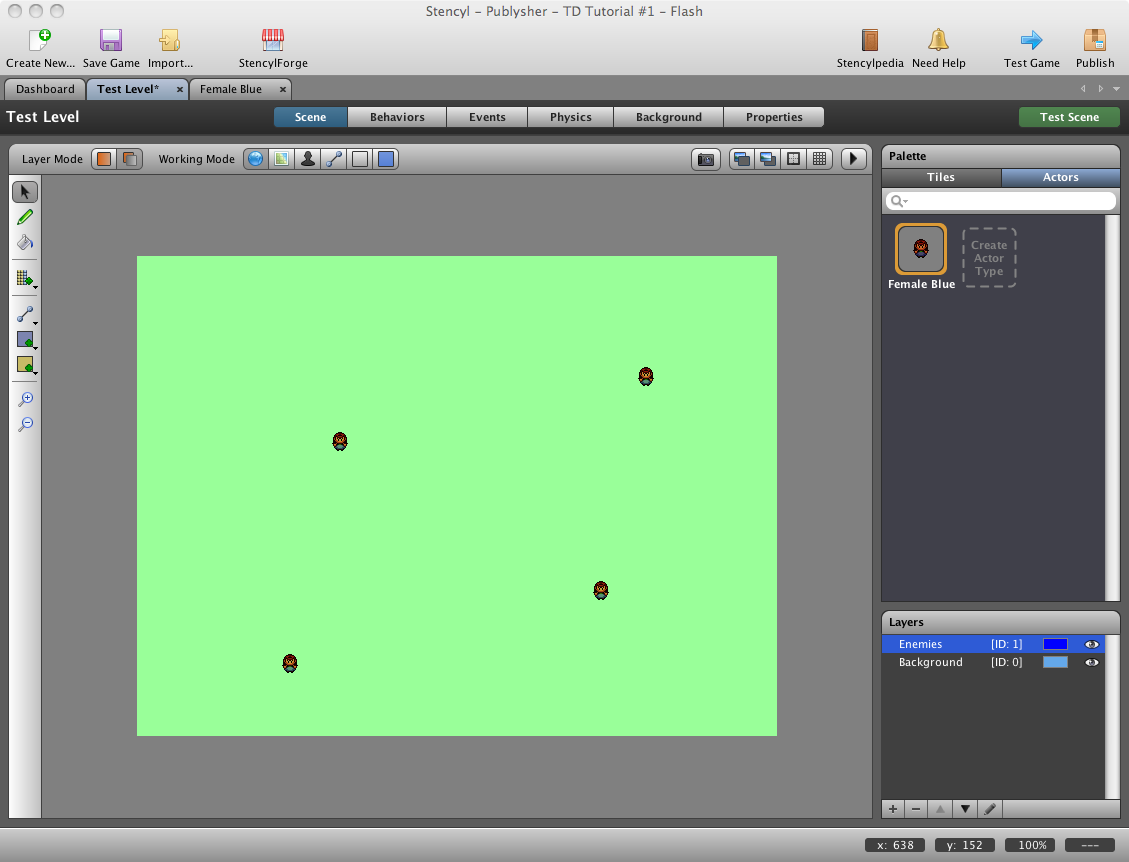
Go back to the Test Level tab. On the right-hand side of the window, double-click the “Layer 0” layer and rename it to “Background”. Click on the “+” button and rename your new layer to “Enemies”. Switch to the Actors tab, click on “Female Blue” and place a few enemies on the screen.
Tip: When creating new levels, never be afraid to create new layers. When the complexity of your level increases, you will be very happy if you have remembered to do this.
Try out your first modifications by pressing the “Test Game” button. You’ll see four evil women standing on a green background.
Bringing Our Enemies To Life
Of course, static enemies are the most boring kind. Let’s spice ‘em up.
Go to the “Female Blue” tab, click on the “Behaviors” tab and press the “Add Behavior” button in the bottom left corner. Search for the pre-shipped Wander behavior and double click. Time to press “Test Game” again. You’ll now see how the evil witches wander around the screen, eventually wandering off screen, never to come back.
Go back to the “Female Blue” behaviors tab and click “Add Behavior” again. This time, select the pre-shipped “Wrap Around Screen” behavior. And you guessed it: press “Test Game” again. This time, our banshees will re-appear on the other side of the screen when they wander off.
Tip: The “Test Game” button is your friend. Every change you make might ruin your game. Better to find out as soon as possible.
Let’s Face It
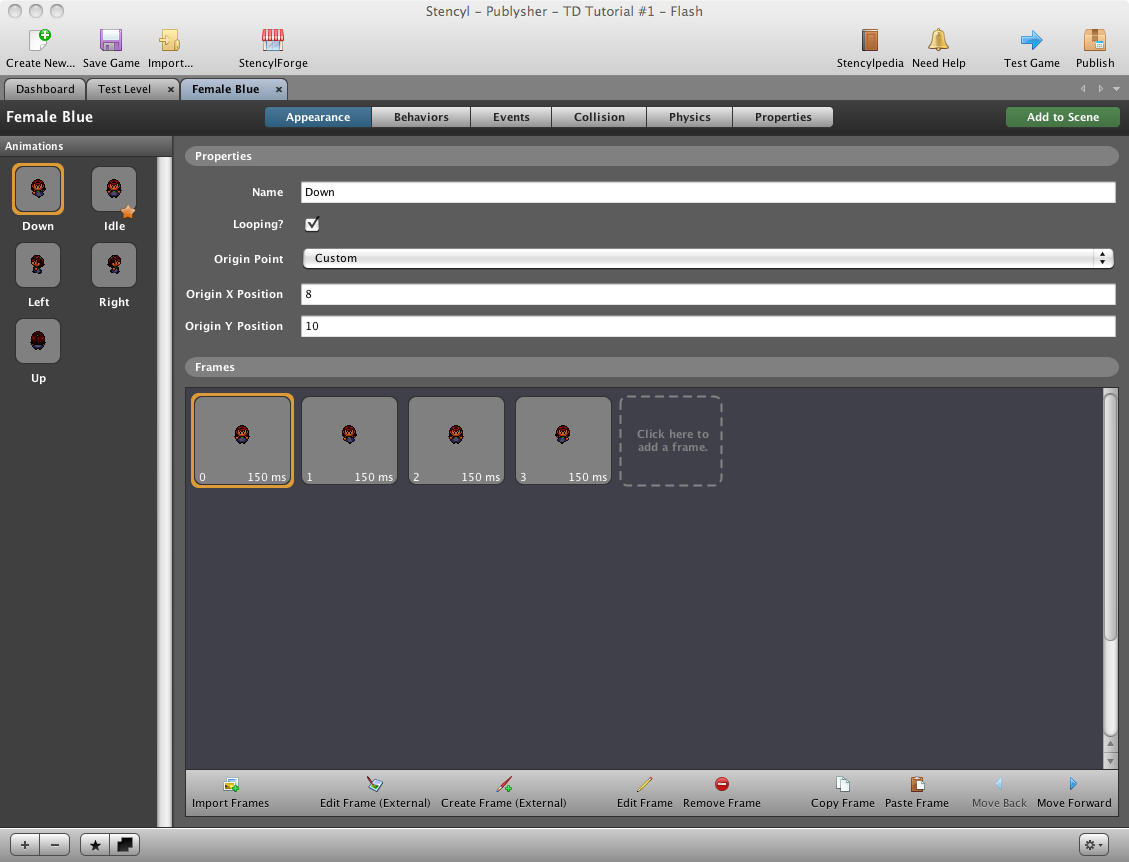
As you have seen, our evil witches might wander around the screen, but their appearance is still quite boring. You might have glanced on the “Appearance” tab of “Female Blue” and seen that there are animations for different directions. Let’s use those!
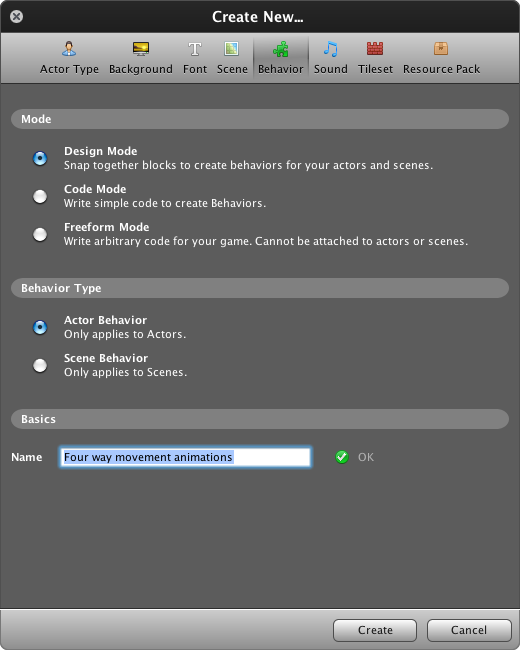
Go to the “Dasboard” tab, and select the “Actor Behaviors” entry. Here you will find the two pre-shipped behaviors we imported earlier. Click on the “Create New” button and create a new Design Mode Actor behavior called “Four way movement animations”.
Before we start implementing this behavior, let’s think.
Tip: Programming behaviors is 90% thinking and only 10% creating. The more you think, the easier creating will be.
Our goal is to determine at every moment in the game which direction our enemy is going. For example, if she’s going to the left, we want to show an animation of a sprite moving to the left. We want to support four directions: up, down, left and right. But what if she’s not moving? Let’s call this “idle”.
Determining the direction of our enemy is done by looking at the speed of the actor. If the speed is 0, the actor is standing still. If the speed in the horizontal direction (the x-direction) is negative, our actor is moving to the left. If the speed in the vertical direction (the y-direction) is negative, our actor is moving to the top of the screen.
If both the x- and the y- direction are negative, our actor is moving to the top-left corner of the screen. In that case, we will use the greater speed to dermine if we want to use the “up” or the “left” animation.
Creating Our Behavior
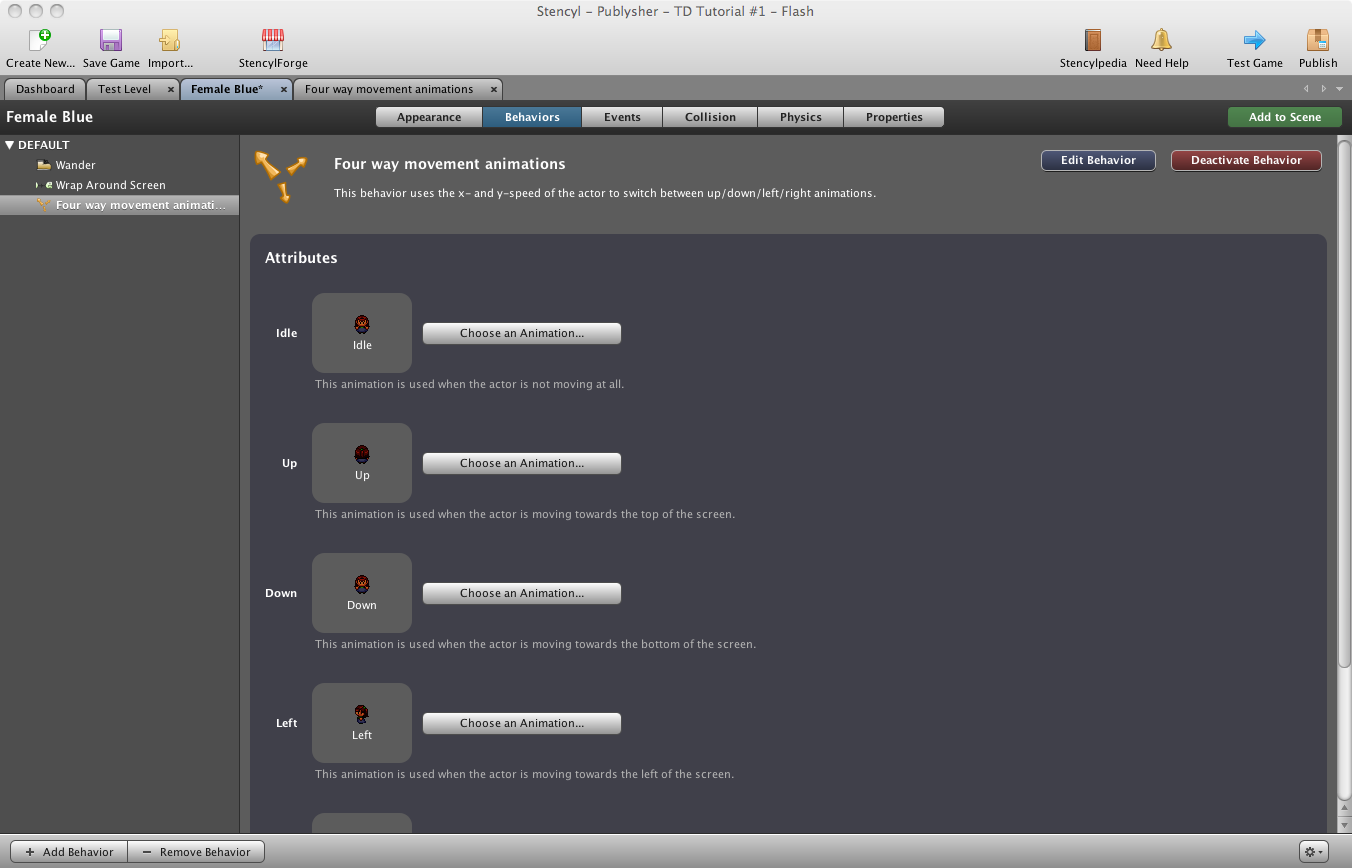
From our thinking, we have determined that our behavior needs to know about five different animations. Let’s start by creating Attributes for this. On the right-hand side of the screen, press “Add Attribute”. Call it “Idle” and select the “Animation” type. Press OK and repeat this with attributes called “Up”, “Down”, “Left” and “Right”.
Tip: To prevent the tutorial from getting too verbose, I have omitted the description. In your own games, you should always provide a description. Right now you might find it self-evident, but when you’re still working on your game after two months, you start forgetting stuff.
Now, click the “Add Event” button on the left and choose the “Basics”, “When Updating” event. All the code in this block will be executed at every frame. Try to recreate the following structure:
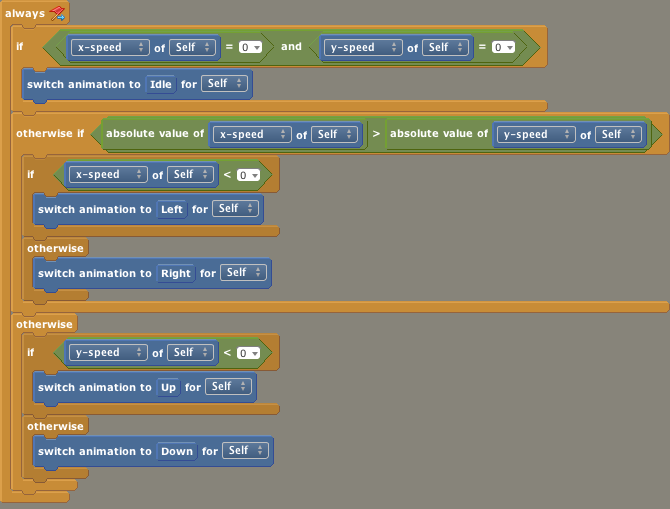
This tutorial is not about programming, but the structure follows our thinking outlined above.
Attaching Our Behavior
Switch back to the “Female Blue” tab and choose Behaviors. Once again, choose “Add Behavior” and add the “Four way movement animations” behavior. On the right side of the screen, we can see the attributes we created earlier. Fill them.
Press “Test Game” again and watch in wonder as our enemies have come to life.
Wrapping Up
In this tutorial, I have:
- created a simple scene to test my ideas;
- created a simple enemy actor;
- added those enemies to my scene;
- used pre-shipped behaviors to let my enemies wander around the screen;
- created a custom behavior to animate my enemy actors;
The final result can be played here and the game can be downloaded from StencylForge under the name “Publysher - TD Tutorial #1”.
In part 2 of this tutorial I will add a Tower to shoot those evil minions.
Do the wave
Staying alive
Satisfaction
Creating towers
Follow the path
Choosing your target
Shooting
Getting healthy
Adding towers
the humble beginnings
Making Preparations