Stencil tutorial 7:
Creating towers
Until now, my TD game has been a proof of concept, mainly concerned with programming. The end result so far has been something to look at, without any user interaction at all.
It’s time to change this.
In this episode I will give the player the possibility to add towers on predefined spots. You will learn something about gaming trade-offs and GUI programming.
The result can be seen here; you can also find it on StencylForge under the name “Publysher - TD Tutorial #7”.
Expanding the Game
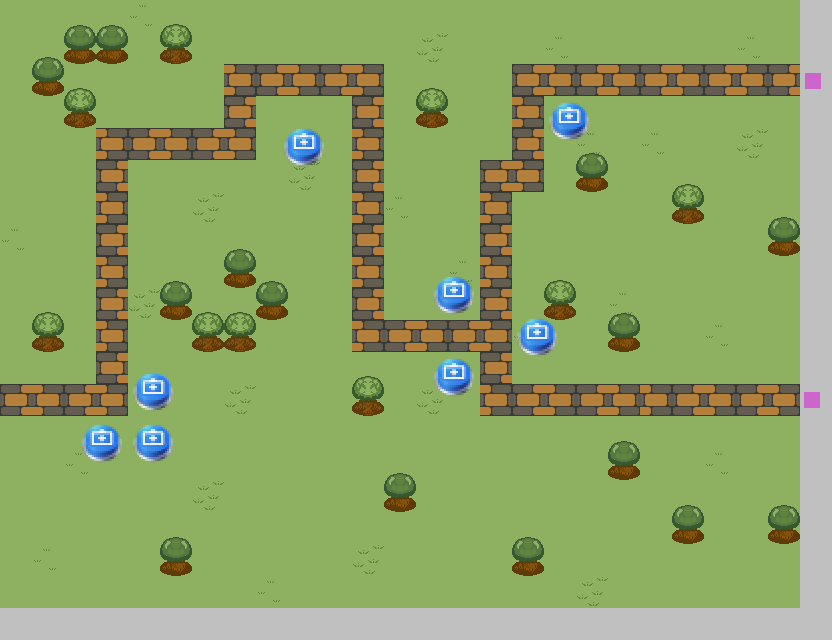
So far, the game was dimensioned at 640x480. While this is an ideal resolution if you want to have your game published everywhere, some research shows that most popular TD games are actually closer to 800x600. This size is still acceptable for popular sites such as Kongregate and Newgrounds and it gives me room to actually put some content in the levels. So, I’ve used the Game settings to give my game a screen of 800x600.
Of course, once your screen grows in size, your scenes should be bigger as well. I’ve updated the test scene to 26x20 tiles, which translates to a scene size of 832x640 pixels. This gives me some room at the right and the bottom to place my enemy spawners out of sight.
Stencyl puts its screen (camera) at the top-left corner by default, so as long as I only use the right and bottom sides for my spawners, this will work.
More Content
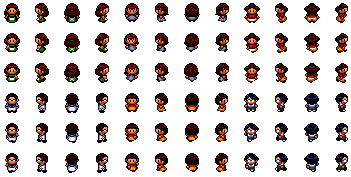
Another annoyance was the availability of one enemy and one tower. So, I’ve imported a few new resources and added the behaviors, resulting in a grand total of six enemies and three towers. I’ve also updated the enemy spawners to actually use the new enemies.
You can download the sprites from StencylForge by searching for the “PixelWorld Resource Pack”.
Theory: Creating Towers
When looking at existing TD games, there are essentially two ways of adding towers:
- Using some kind of dock you can select the tower you want to place, and then choose the correct position on the level, either by dragging or clicking.
- The level contains predefined spots where you can add towers by clicking on such a spot and then selecting the tower you want there.
I have decided to opt for #2 for a number of reasons:
- Option #2 does not require a dock, giving you more screen estate for the actual game.
- By limiting the possible positions of towers you can influence the difficulty of the level.
- The user interaction for creating a tower and upgrading a tower becomes identical.
- My previous game already used option #1, and I wanted to try something new :-) .
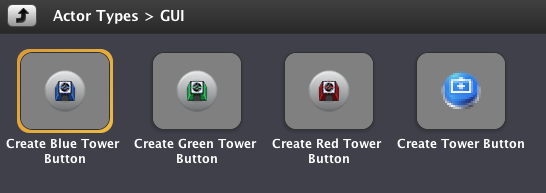
The final result will consist of big “+” buttons on the level. Pressing a “+” button will cause multiple new buttons to fan out around it; each type of tower will have its own button. Pressing one of those buttons will build a tower on the spot of the “+” button; clicking anywhere else will remove the buttons from the screen.
Creating the buttons
In order to reach this result, I started out with finding some useful button-sprites. In my experience, IconFinder.com is a great source for such buttons. I made sure the “+” button was 48x48 pixels, the same size as my towers. I’ve also created a new Collision group called “GUI” and placed the buttons in that group.
Tip: The internet is full of graphics you can use in your games. Just make sure that the author has given permission to use it for your own purposes!
The next step was to open my test scene and replace the existing towers by “+” buttons; for good measures, I’ve added a few more :)
Since buttons and other GUI elements should always provide visual feedback, I started out with creating a Design Mode Actor Behavior called “Button Feedback”.
Tip: Always give your players feedback – more is better.
There are various way of providing feedback, but for now I’ve only used a simple highlight on mouse over.
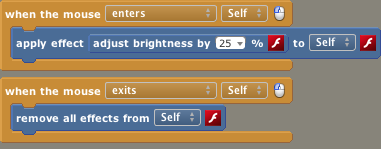
Pretty easy, no?
A valid question would be: “why not use the predefined Emphasis On Mouse Over behavior?” After all, in my previous posts I’ve advocated using predefined behaviors as much as follows.
The answer is that my new Button Feedback behavior and the Emphasis On Mouse Over behavior are different in two important ways:
- The Button Feedback behavior requires no configuration – this makes it very easy to have all buttons give exactly the same feedback.
- The Emphasis On Mouse Over behavior can give only one kind of feedback – the Button Feedback can easily be extended with Mouse Over sounds, Click sounds, growing, shrinking, etc…
Button Fan
The next step was to think about the fanning behavior and creating the towers.
For the fanning behavior I decided to keep it simple for now, and to create a simple behavior for exactly three buttons. In the near future I will probably expand this to support more or less buttons, disabled buttons etc., but for now this is just what I need.
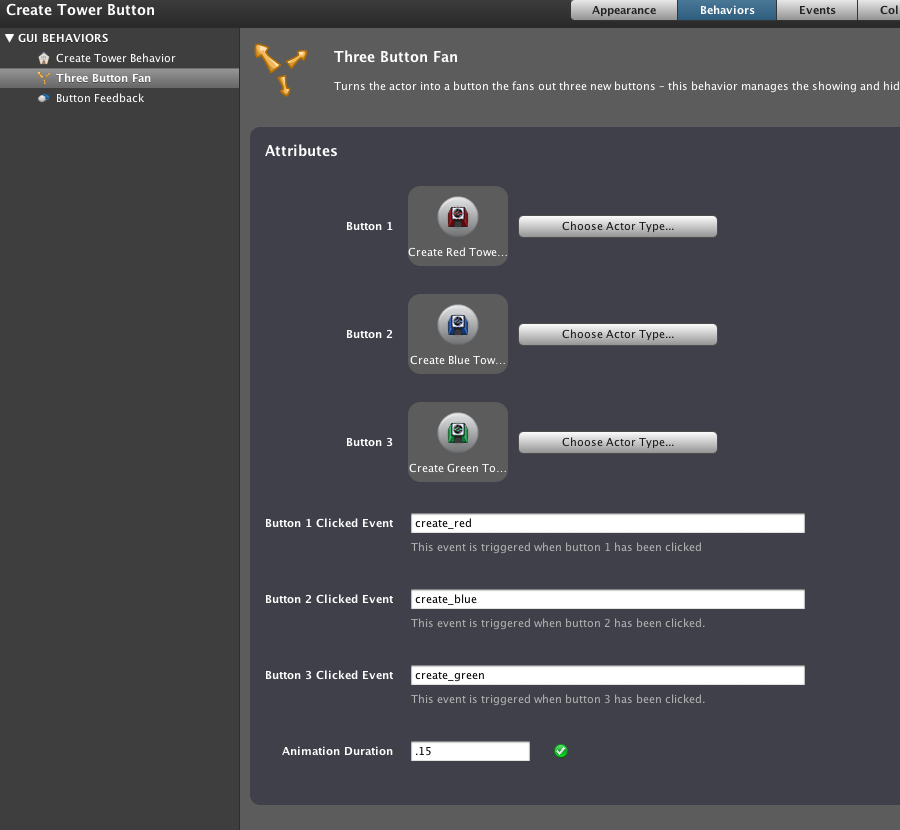
The behavior will require a number of attributes:
- An Actor Type attribute for each of the buttons being created.
- The name of the event to trigger when a button has been clicked, one attribute for each button.
The basic flow will like this:
- Create the three buttons
- When the central button is clicked:
- Create the three buttons
- Move them to positions around the central button
- When one of those buttons is clicked:
- Trigger the relevant event
- Move the three buttons back to the center and hide them
- When the user clicks anywhere but on the central button:
- Move the three buttons back to the center and hide them
This translates into a number of events and custom blocks:
- [When creating: when created]:
- Create the three buttons and hide them
- [Custom: Show Buttons]:
- Check that the buttons are not already visible
- Show the buttons
- Slide them into the correct position
- [Custom: Hide Buttons]:
- Check that the buttons are not already hidden
- Slide the buttons back to the center
- When the sliding is done: hide the buttons
- [Input > Click: When the mouse is released]:
- If the center button was clicked:
- call [Show Buttons]
- Otherwise:
- call [Hide Buttons]
- If one of the three buttons was clicked:
- Trigger the relevant event
- If the center button was clicked:
Which results in this behavior:

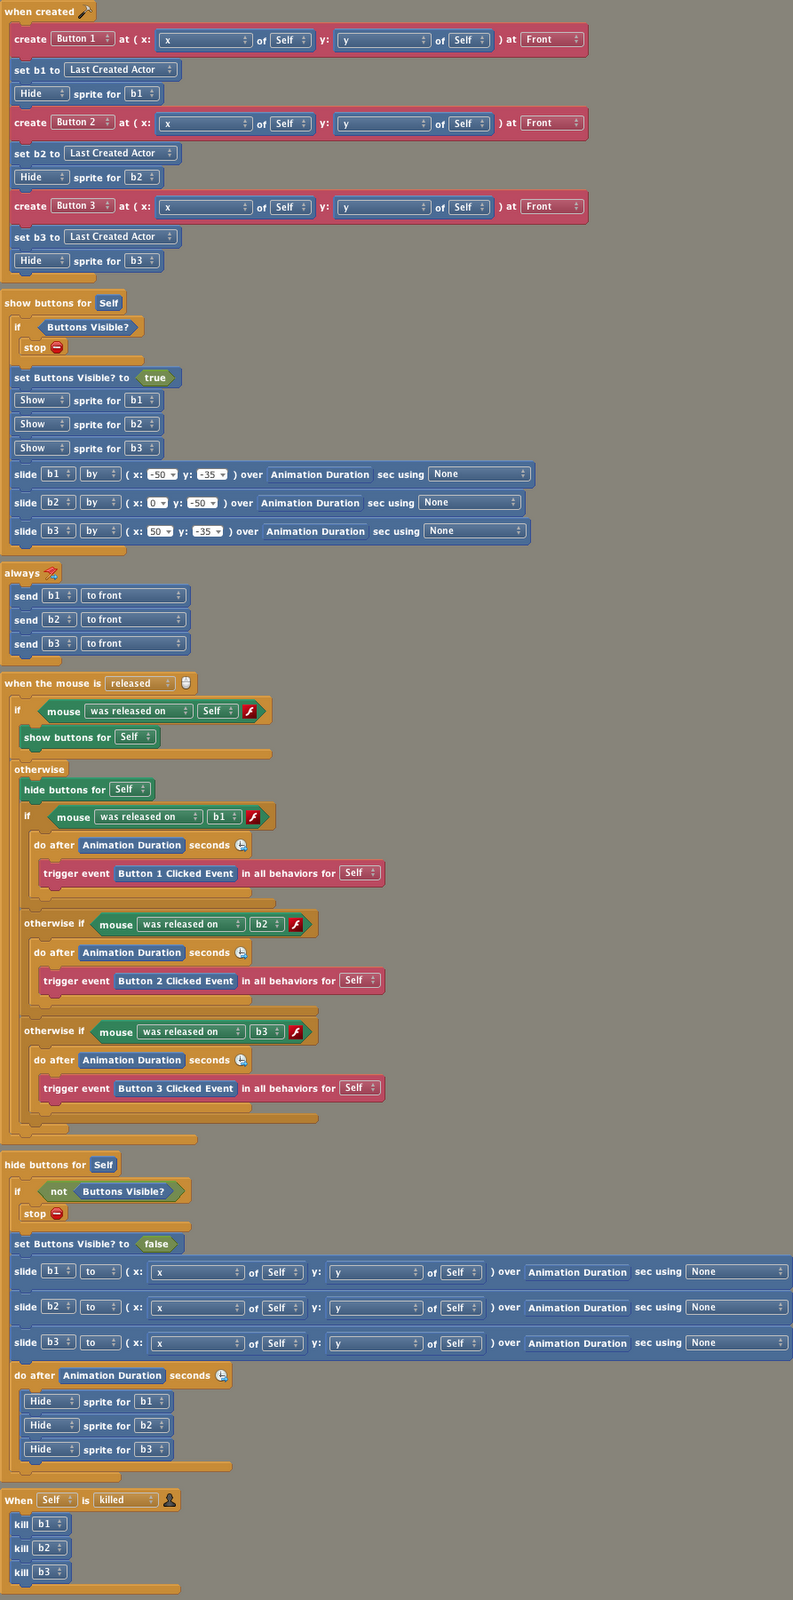
As you can see in the final result, during my programming I’ve added some extra attributes; two more events were added after debugging:
- [Actors > Created or Dies > Specific Actor: When Self is Killed]
- Kill the three buttons
- [When updating]
- Send the buttons to Front
Leaving out Event #1 and turning on the Game Debugger showed that the buttons were kept alive. It’s good practice to kill actors you no longer need. Event #2 solved a weird bug where my enemies would walk over my buttons – not very appealing.
This behavior was attached to my “+” button and configured as follows:
Time for some play-testing!
Create Tower Behavior
After all the work done for the Button Fan, implementing the Create Tower Behavior became really easy:
- If the red button was pressed:
- Create a red tower and kill the “+” button
- If the blue button was pressed:
- Create a blue tower and kill the “+” button
- If the green button was pressed:
- Create a green tower and kill the “+” button
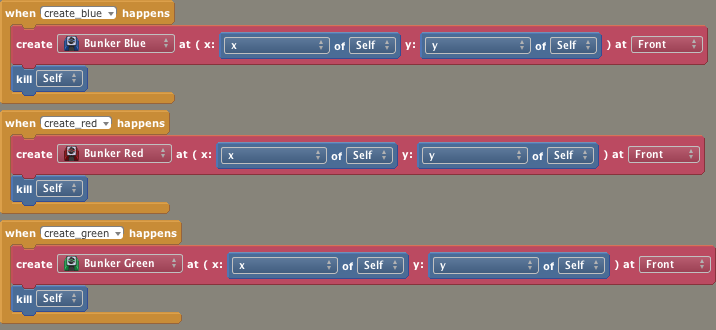
This behavior too was attached to my “+” button and I could play-test again.
Wrapping Up
In this tutorial I have:
- Expanded my game, both in size and in content
- Decided upon a way to create new towers
- Introduced my first GUI buttons
- Ensured that the buttons worked as desired
The final result can be seen here, and the game can be downloaded from StencylForge under the name “Publysher – TD Tutorial #7”.
In the next part I will start keeping score on kills, and make the possibility of creating towers depend on the current score. Stay tuned!
Do the wave
Staying alive
Satisfaction
Creating towers
Follow the path
Choosing your target
Shooting
Getting healthy
Adding towers
the humble beginnings
Making Preparations